
In the previous article I wrote about the key features of model architecture that enable us to run them on consumer hardware. Specifically with regards to the qwen-3.6b-35B-A3B model.
In this article, I'll explain the steps that I took to get this model running on my desktop. To recap, these are the hardware specs of my desktop:
- GeForce RTX 5080 video card
- 16 GB VRAM
- 64 GB regular RAM
- Ryzen 9800X 3D CPU
Although the RTX 5080 has 16 GB of VRAM, this model can be run even with smaller cards with 8 GB or VRAM.
I'm going to describe the steps for running on an NVIDIA card through CUDA. Mac OS has unified memory and doesn't use an NVIDIA card, so the process is much simpler – skip the CUDA steps and just run the model directly without any CPU offloading steps.
I am running the model on a Windows desktop machine. You can, of course, also run it on Linux. In Windows also, we have the choice of running it under Windows Subsystem for Linux (WSL) or directly in Windows itself. I've done both and find that running it through the WSL abstraction makes the model serving a bit slower.
Ok, let's get started.
Install GPU drivers and CUDA toolkit
first thing you want to check is if your NVIDIA drivers are up to date. Install the latest version of your GPU drivers. You can run the nvidia-smi command in the terminal to check the version you currently have. This is the output that I get:
> nvidia-smi

Thu Jul  2 14:42:06 2026
+-------------------------------------------------------------------------------+
| NVIDIA-SMI 596.36         Driver Version: 596.36       CUDA Version: 13.2     |
+---------------------------------+----------------------+----------------------+
| GPU  Name          Driver-Model | Bus-Id        Disp.A | Volatile Uncorr. ECC |
| Fan  Temp   Perf  Pwr:Usage/Cap |         Memory-Usage | GPU-Util  Compute M. |
|                                 |                      |               MIG M. |
|===============================+========================+======================|
|   0  NVIDIA GeForce RTX 5080   WDDM  |   000000:01:00.0  On |             N/A |
| 33%   44C    P3          39W /  360W |  3551MiB /  16303MiB |  0%     Default |
|                                      |                      |             N/A |
+--------------------------------------+----------------------+-----------------+
It shows me the driver version (596.36) and the maximum supported CUDA version for this driver (13.2). Note that this is only the maximum supported CUDA version, the actual CUDA version that you use could be less than this.
Next, if you plan to build llama.cpp from source in the next step, you will need CUDA toolkit. Pre-built binaries are available on Windows, so this step is only required for Linux.
You can get CUDA toolkit from the link below. Choose the CUDA version based on the maximum supported CUDA version for your driver as mentioned in nvidia-smi

Install llama.cpp
We're going to serve this model using llama.cpp. llama.cpp is the serving layer used by Ollama and LM Studio. We will use llama.cpp directly because we want to customise command line flags that we want to use for serving this model.
To start with, go to the llama.cpp website and download the relevant release for your operating system.
- If you are on Linux, then you'll need to get the source and build the binary yourself with GPU flags enabled against the CUDA version that you installed in the previous step. Follow the build guide here.
- If you are on Windows, you can download a prebuilt binary from the llama.cpp releases page. There is one release for CUDA 12.x and another for CUDA 13.x versions. Choose the one that is supported by your driver mentioned in
nvidia-smi. Along with the main release, there will be another link to download CUDA DLLs. Download that as well. Then unzip llama zip file somewhere and unzip the CUDA DLLs into the same place.
Once the installation is complete, you should have a file llama-server. On linux it will be inside build/bin, while on windows its in the main folder where you unzipped everything.
llama-server is working by opening a terminal and running it without any parameters. It should load without any errors and it should detect your graphics card with a message like this: ggml_cuda_init: found 1 CUDA devices (Total VRAM: 16302 MiB)Press
Ctrl + C to quitIf it doesn't detect the card, check that build flags were correctly set, it found the right CUDA toolkit installation (Linux) or the CUDA DLLs were placed in the right place (Windows)
Get the model
We are going to use a quantized version of the model. This version was quantised by the unsloth team and is available from huggingface via the link below:
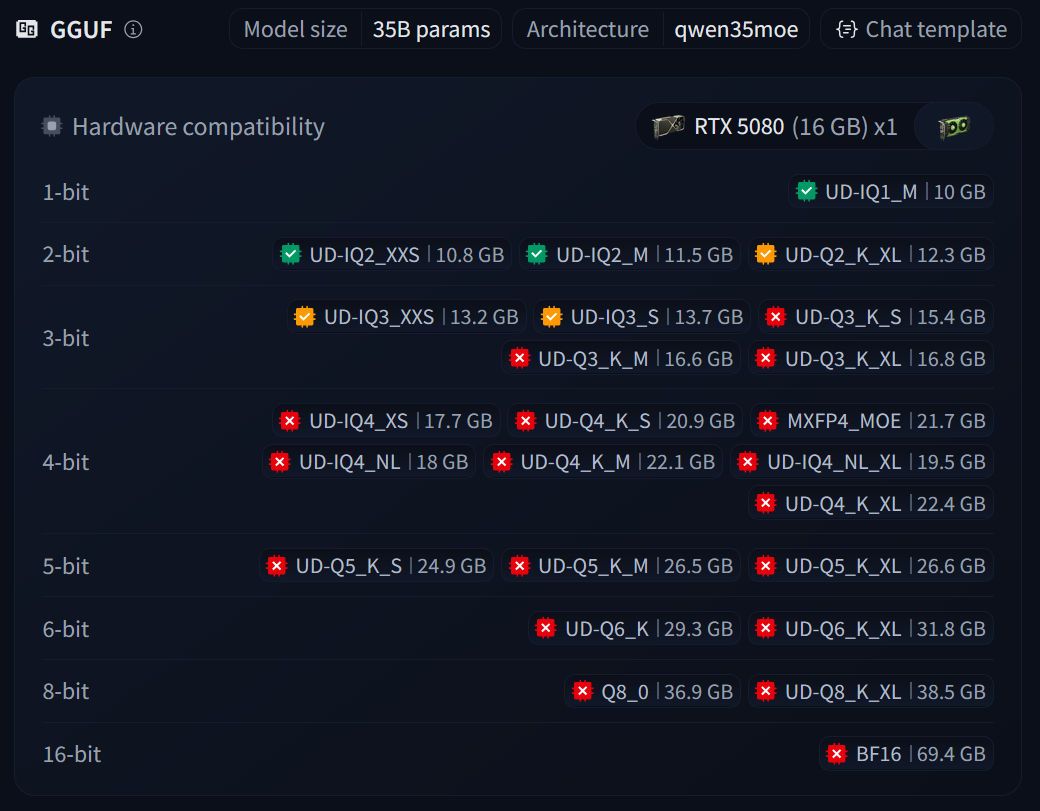
There are many possible quantised variants available. Choose the one that suits your hardware. A good one to start with (and the one that I'm using) is Qwen3.6-35B-A3B-UD-Q4_K_M
Once you've decided which quantisation variant you want, you can download it using the llama-cli tool.
First, set the LLAMA_CACHE environment variable to the location where you want to download to. Then run the command for your quantisation variant. For the UD-Q4_K_M variant, the command would be
llama-cli --hf-repo unsloth/Qwen3.6-35B-A3B-GGUF:UD-Q4_K_MThis will download the LLM model file in GGUF format (the format used by llama.cpp).
Once downloaded (it will take a few minutes as it's quite large), you should have a file Qwen3.6-35B-A3B-UD-Q4_K_M.gguf on your disk. This is the model file that we will have llama.cpp serve
Serve the model
Now everything is setup for us to serve the model. This is the command
llama-server -m .\Qwen3.6-35B-A3B-GGUF\Qwen3.6-35B-A3B-UD-Q4_K_M.gguf --alias qwen3.6-35b-128k --host 0.0.0.0 --port 8083 --fit-target 256 -ncmoe 18 --cache-type-k q8_0 --cache-type-v q8_0 -c 131072 -np 1 -t 12 --jinja --metricsYou will most likely need to customise this command based on your hardware, so let's break it down
-m .\Qwen3.6-35B-A3B-GGUF\Qwen3.6-35B-A3B-UD-Q4_K_M.gguf: This is the path to the GGUF file you downloaded in the previous step--alias qwen3.6-35b-128k: This is just a friendly human-readable name you can give for the model--host 0.0.0.0: The IP address that the server should listen on.0.0.0.0binds to all interfaces--port 8083: The port that the server should bind on--fit-target 256: The number of layers that the model should try to fit onto GPU. Basically this tells to fix as many layers as possible on the GPU-ncmoe 18: The number of mixture of expert layers to offload to CPU--cache-type-k q8_0and--cache-type-v q8_0: The type of quantisation to be used in the key-value cache. Apart from model weights, the KV cache uses up significant GPU VRAM, so we configure quantisation here to make it use less VRAM-c 131072: This is the size of the context window. This number is for a 128k context window. Higher the number, more VRAM you will need-np 1: Maximum number of parallel requests. For a single user setup,1is fine here-t 12: Number of CPU threads to use--jinja: Use jinja syntax for the prompt completion template--metrics: Calculate and send metrics with the response (tokens/sec etc)
Off these, you will mostly need to play around with --fit-target, -ncmoe and -c flags to see what are the optimal values for your hardware. Finding the right values here is complete trial and error, so play around and see what works.
Look for the terminal message like this to confirm that llama.cpp is utilising the GPU
load_tensors: offloading output layer to GPU
load_tensors: offloading 39 repeating layers to GPU
load_tensors: offloaded 41/41 layers to GPU
load_tensors:   CPU_Mapped model buffer size =  9546.18 MiB
load_tensors:        CUDA0 model buffer size = 12231.34 MiB
Testing the setup
Open up the browser to http://localhost:8083 (or whatever --host and --port you configured). You should see a chat screen like below
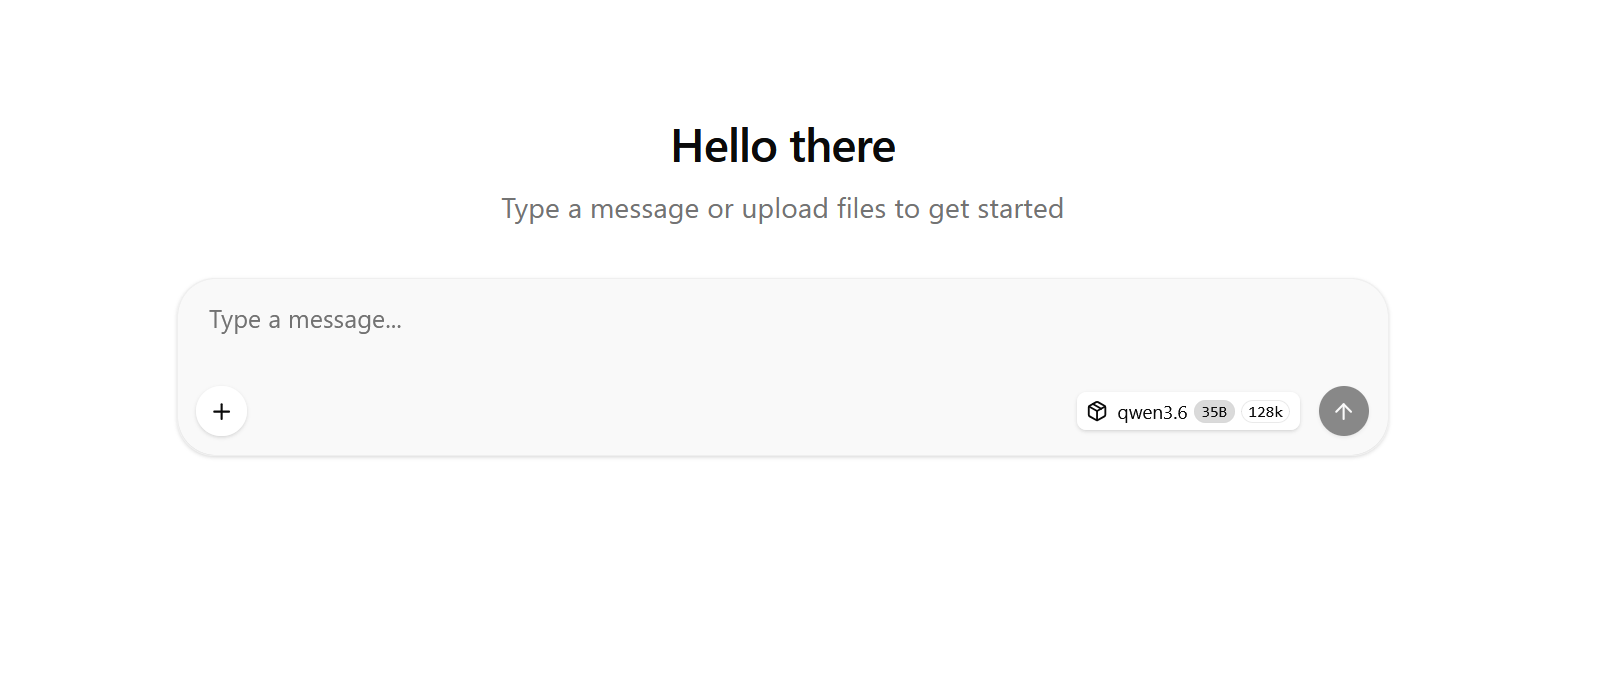
It will show qwen 3.6 as the selected model (using the configured --alias string here). Go ahead and give a few example prompts. As the response is received, you can see the token/sec metric displayed in the response.
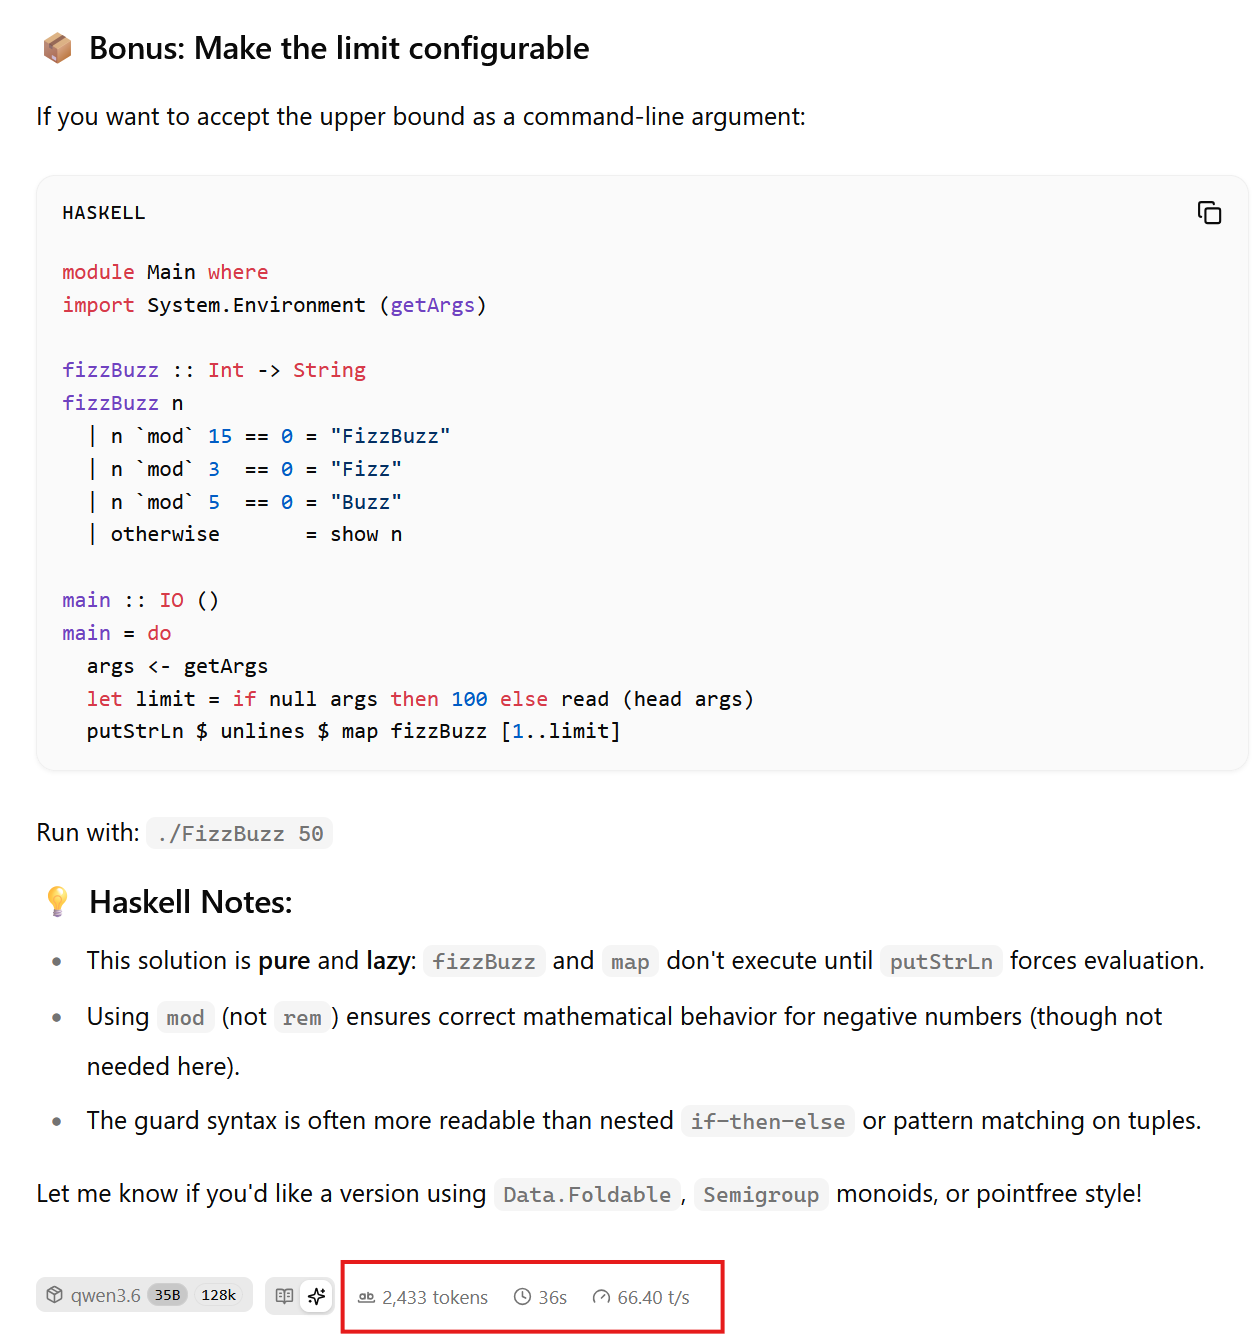
On my RTX 5080 with 16GB RAM I get around 60-70 tokens/sec. With an 8GB VRAM card you'll get around 5-10 tok/sec. Change the command line paratemers until you find the optimal settings for your hardware.
Tips
Here are some tips on adjusting the flags:
- Start by adjusting
-ncmoe. This denotes how many layers should be offloaded to CPU. The more layers off-loaded, the slower will be the response, but also it will be smaller to fit in VRAM. Start with a higher value like 25 and slowly bring the number down one by one, and test each setup. Each decrement to-ncmoeshould slightly speed up inference, until a threshold point where the speed suddenly drops. The one higher value than the threshold should be the optimal value of-ncmoe - If the ideal
-ncmoeis too high, you can try making the context window smaller by adjusting-cparameter - Sometimes you might have another app or video game that is using some of your VRAM. Shut these down! You need all your VRAM for your model. This happened to be more than once as I have many GPU accelerated apps on my desktop.
Summary
These are the steps that I took to get Qwen 3.6 35B A3B model running on my desktop. Try it out and see how it works for you!
Did you like this article?
If you liked this article, consider subscribing to this site. Subscribing is free.
Why subscribe? Here are three reasons:
- You will get every new article as an email in your inbox, so you never miss an article
- You will be able to comment on all the posts, ask questions, etc
- Once in a while, I will be posting conference talk slides, longer form articles (such as this one), and other content as subscriber-only